A white background with blue polka dots on it

    Breathing: Our Very Own Superpower, and 3 Simple Ways to Use it!

    Alessia Manzoli, Registered Psychotherapist, Certified Yoga Teacher • March 1, 2023

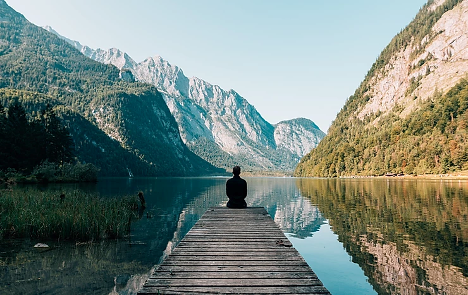
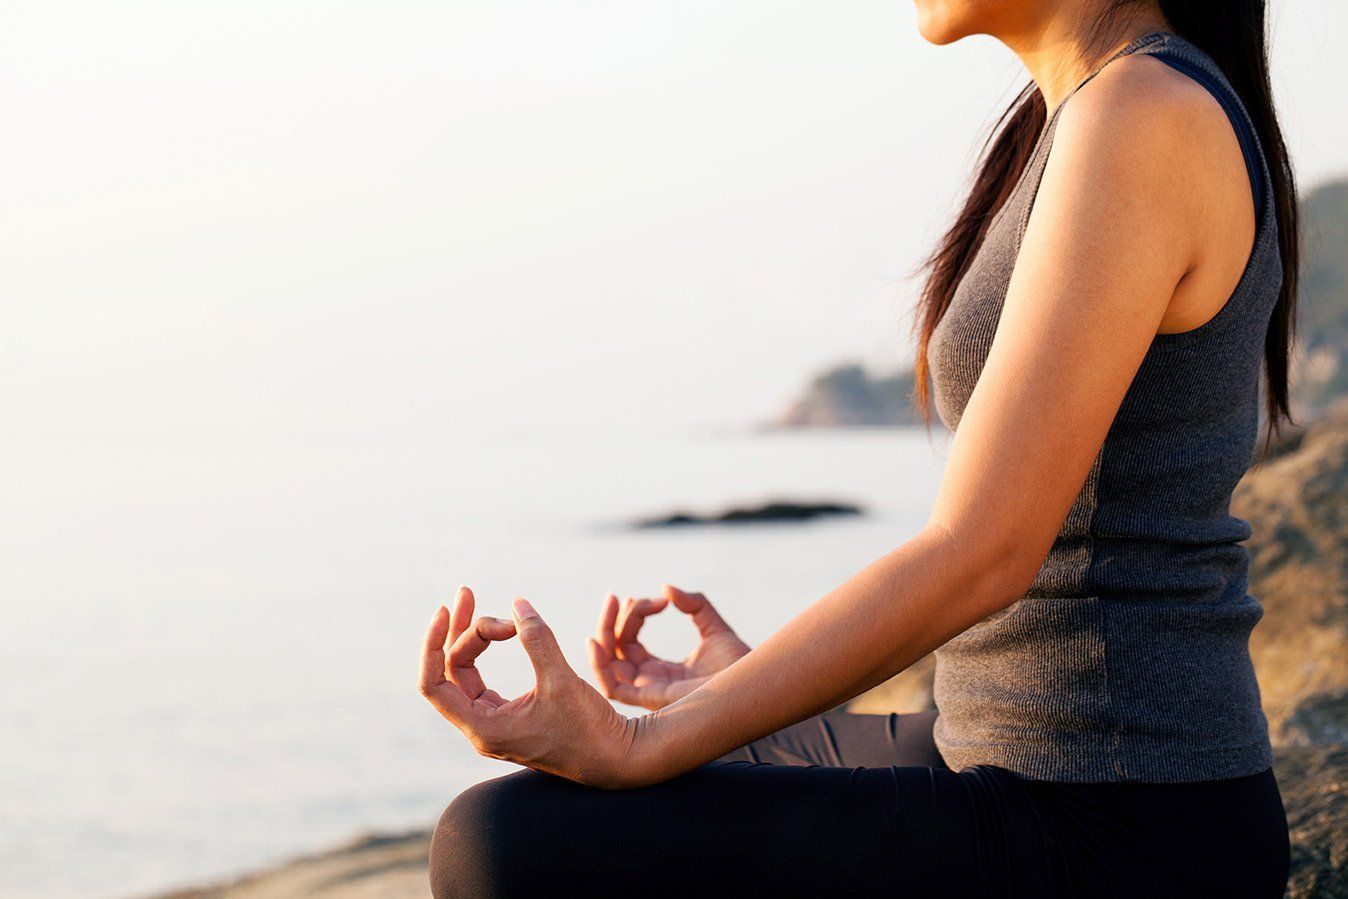
    Yes, you read that correctly. Breathing is a superpower.


    We often overlook it because it's an automatic process. It's something that our body can do without us really having to pay attention to it. However, we are going to invite you to spend a few minutes thinking about it, because when used intentionally and mindfully, breathing can be our greatest tool for physical and mental calm, clarity, and presence!


    Why Should I Pay Attention to the Breath? 


    There are numerous benefits that come from engaging in mindful breathing. Some of the key ones include:

    • Reduces cortisol levels


    • Delivers more oxygen throughout the body


    • Slowing down heart rate


    • Detoxes the muscles; reduces muscle tension


    • Improves posture


    • Increases attention and focus


    • Increases energy levels


    • Mental relaxation


    • Reduces negative affect


    Breathing, Cortisol and the Stress Response  


    When you're stressed, your sympathetic nervous system fires up, and several hormones such as adrenaline and cortisol are released into your body. This is all a part of your fight or flight response. In this state, there is a whole cascade of effects.


    • Rapid breathing


    • Increased heart rate or feeling like your heart is racing


    • Muscles tensing up; feeling agitated or over-stimulated


    • Body is focused on escaping "danger" or "threat"


    As a result, other systems of the body that are not critical to your physical safety are moved down the priority list, such as the immune system. That’s why when you’re stressed, you’re more likely to get sick and it can take you longer to heal.


    Fight or flight is greatly beneficial to us when we are in moments of danger, such as the classic (and mostly irrelevant) example that we've all heard running from a bear. Thankfully, it's rare for us to be in such moments of grave danger. Yet, most people find that their fight or flight response still gets easily triggered - sometimes, even just by thinking about a time that was stressful or scary.


    Mindful breathing is such a powerful tool because it can directly impact which state you are in. Shallow, rapid breathing can trigger fight or flight, while deep breathing can trick the body into a rest and digest state. 


    Even in moments of stress and anxiety, if mindful breathing is used, you can override the whole fight or flight system; your muscles relax, your heart rate slows down, and things like your immune and digestive systems can be prioritized again. Your mind is able to relax because your body becomes a safe place for you to be more present in.


    Practical Application: Step One, How do I assess my breathing?

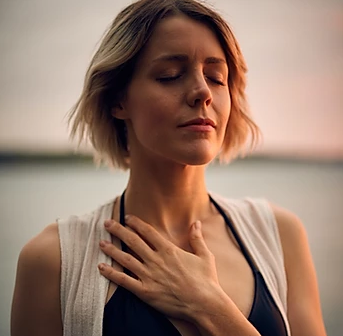
    I always like to start off with a baseline measurement of my breathing to see where my mind and body are at. This can be done from any seated position. Begin by placing your left hand over your chest, and right hand over your belly. Without changing anything at all, notice where your breath falls. Does it fall more in your left hand, in your chest? Does your right hand move as well? Does it feel shallow or deep, short or long, fast or slow? Without judgment, notice the quality of the breath.


    Breathing Techniques


    Here are three simple practices that I like to use when I'm needing to calm my body and return to the present moment.


    1. Diaphragmatic or Belly Breathing

    Your diaphragm is a muscle near the bottom of your ribcage that aids in breathing. When you breathe deeply, it creates more space in your lungs to enhance oxygen intake.


    • Once again, place your hands over your heart and your belly
    • As you inhale, breathe deeply so that you feel your belly expanding. This is a sign that your diaphragm is being engaged
    • As you exhale, release all the air, and feel your belly relax. This gif can be a great guide in slowing the breath!


    Like any other new experience, this practice may be a challenge to do at first. Your diaphragm may feel tight, like it can't expand too much. You may even feel physically dizzy; this is because when your body is accustomed to shallow breathing, it's a new experience to have such a large oxygen intake. If it feels too dizzying, allow yourself to pause and take smaller steps. There is no need to rush. The diaphragm is the same as any other muscle: it gets stronger with practice and time. Be gentle with yourself during this.


    VIEW TRIANGLE BREATHING VIDEO


    2. Square or Box Breathing


    Like belly breathing, the idea is to take deeper breaths while engaging the diaphragm. This technique is a more controlled version that also focuses the mind by including the component of counting.


    • Set yourself up in the same way you would for belly breathing
    • Inhale deeply for 4 counts. Send your breath all the way into your belly, so you feel your hand rising
    • Pause for 4 counts. Hold your breath. Be in the moment
    • Exhale slowly for 4 counts. Release all that doesn’t serve you
    • Pause for 4 counts. Reset
    • Continue for 5 breath cycles, or until you feel at ease


    VIEW SQUARE BREATHING


    3. Alternate Nostril Breathing


    This one is a little different. Rather than focusing on breathing into the belly, the focus is on, you guessed it, your nostrils!


    • Using your right hand, hover your thumb and ring finger around your nostrils. If you'd like to include chakra or energy work in this, place your index and middle finger on your third eye, right between your eyebrows
    • Place your thumb on your right nostril. Inhale slowly through your left nostril
    • At the top of the breath, close both nostrils briefly
    • Keeping your left nostril closed, open your right nostril. Exhale slowly
    • Inhale through your right nostril. Pause briefly at the top
    • Exhale through your left nostril. Repeat the cycle for two minutes


    I love this technique because it physically forces you to slow your breathing down. I even like to close my eyes and visualize my breath moving through the points of contact in my fingers, cleansing my headspace and upper chakras.


    When Should I Use the Superpower?


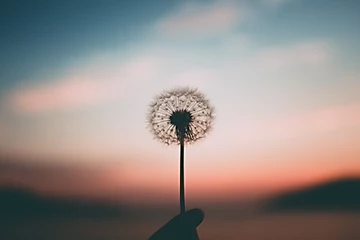
    The most honest answer is whenever you want, as often as you want! This is not one of those powers that needs to be saved for moments of distress. The beauty of breathing is that you are ALWAYS doing it! It is a powerful and beautiful cycle of beginnings and endings, giving and receiving, holding on and letting go. It can be used at any moment to reset the body and ground yourself in the present moment.


    However, once again, breathing can be especially useful when you are in situations that tend to trigger your stress response. This might be when you are trying to fall asleep, when you are about to enter an anxiety-inducing situation, or even when you're stuck in a traffic jam. When you initiate the deep breaths, you are telling your body and your mind: "You are safe. It's okay. You don't need to run or hide." Utilizing the breath can draw you back into your centre and allow you to navigate each situation with a calm body and mind.


    Be well in mind, body, and spirit!


    Alessia Manzoli is a Registered Psychotherapist & Certified Yoga Teacher at Health Energies Vaughan, where she offers client-centred psychotherapy from a holistic perspective, considering the mind, body, and spirit in her clients' overall well-being.


    CLICK HERE TO LEARN MORE ABOUT ALESSIA MANZOLI

    SPECIAL OFFERS

    Immune Booster Package
    Rejuvenation Facial Package
    April 6, 2024
    Cassoulet Vert A modernized White Bean Stew enlivened with Lemony Kale Pesto that is meat-free and that can be made in an Instant Pot! Fast, healthy delicious! INGREDIENTS: 3 x 14-ounce cans White Beans ( 4 ½ cups cooked), drained (or scroll down for Instant Pot Dry beans) 2 tablespoons olive oil 1 onion, diced 4 garlic cloves, rough chopped 1 cup veggie broth or chicken stock 1 teaspoon salt pepper to taste 1 teaspoon dried herbs de Provence (or sub dried thyme or rosemary) Lemony Kale “Pesto” 2 cups of kale, packed (about 1 small bunch, stems removed) ½ bunch Italian parsley or basil (about 1 cup packed, thins stems ok) or a combo of both 2 cloves garlic zest and juice from one medium lemon! ¼ cup nuts (optional) - like toasted sliced almonds, cashews, toasted pinenuts, smoked almonds are nice too (or leave them out) ¼ cup olive oil ¼ cup water (or more, just to get this into a thick “paste”) 1 teaspoon salt Garlicky Bread Crumbs or Croutons (or store bought, saves time!) 1–2 slices bread, torn into little pieces 2–3 tablespoons olive oil 1–2 garlic cloves, smashed pinch of salt Garlicky Bread Crumbs or Croutons (or store bought, saves time!) 1–2 slices bread, torn into little pieces 2–3 tablespoons olive oil 1–2 garlic cloves, smashed pinch of salt Garnish: garlicky breadcrumbs, shaved pecorino cheese or parmesan, or try a soft poached egg, avocado, or crumbled goat cheese. INSTRUCTIONS: Stove top: In a large pot or Dutch oven, heat the oil, over medium high heat. Add the onion and garlic, stirring for 3-4 minus until fragrant. Lower heat to medium and sauté for 3-4 more minutes. Add the beans, broth, dried herbs and bring to a gentle simmer. Season with salt and pepper. Cover and set heat to low heat. Make Lemony Kale Pesto. Place the Kale, parsley, and garlic in a food processor. Pulse until chopped. Add the remaining ingredients- zest, lemon juice, oil, water, salt, nuts ( if using). Pulse until well combined but not too smooth. Scrape down sides, pulse again. Make the garlicky breadcrumbs: Heat oil in a skillet over medium heat. Swirl the smashed garlic in the oil infusing it, until the garlic is deeply golden and fragrant, season the oil with salt. Remove the garlic. Add fresh torn bread to the skillet and fry until golden and crispy, stirring. Set it aside. Add the lemony kale pesto to the warm beans, gently incorporating. To loosen add more broth to get a stew consistency. You don’t want this to be too soupy, or too dry. In between. Let this warm up but don’t cook too long or you’ll lose the lovely colour. Taste for salt and lemon. I typically add both. If it’s bland- it needs both. You want this lemony and slightly salty! Serve with garlicky croutons, and a sprinkle of pecorino cheese. Or add avocado, a poached egg, crumbled goat cheese. This simple base recipe can be repurposed into other dishes during the week. Pan-sear a piece of fish or chicken and serve it over top, or let the beans be the base of your next buddha bowl. Have some for breakfast with an egg and toast. Turn it into bruschetta. Toss the cold beans into a salad. You get the idea. BON APPETIT!
    February 1, 2024
    Keto Chocolate Lava Cake - Only 5 Ingredients! This keto lava cake has a deliciously decadent gooey molten chocolate centre. A quick keto dessert with only 5 ingredients! Your friends and family won't believe this delicious recipe is gluten free, low carb and sugar free and contains only 2.8g net carbs per portion. PREP TIME: 5 Mins COOK TIME: 9 Mins TOTAL TIME: 14 Mins SERVINGS: 2 CALORIES: 460 kcal INGREDIENTS: 2 oz unsweetened chocolate (55g), at least 85% cocoa solids 1 tablespoon super-fine almond flour ***see notes. 2 oz butter unsalted, plus more for greasing ramekins 2 eggs 3.5 tablespoon powdered sweetener or more, depending on the chocolate you use INSTRUCTIONS: Heat oven to 175 Celsius/350 Fahrenheit. Grease 2 ramekins with butter. Melt the chocolate and butter and stir to combine. Beat your eggs well - best with a mixer. Add to the chocolate/butter mix together with almond flour and sweetener and stir. You'll get a dough-like consistency that is pourable. Pour into 2 ramekins. Bake 9 minutes until the top is set but still jiggly. Do not over-bake! Turnout onto plates and serve with a dusting of powdered sweetener and pomegranate seeds or a couple of raspberries. A mint leaf would round off the look nicely! NOTES: Net carbs: 2.8g per portion. If you're using coarse almond flour or ground almonds, increase the amount to 1 ½ tbsp. Chocolate: Use the best quality you can get hold of, with a cocoa solids amount of at least 85%. I used 100% unsweetened chocolate, so added 3 ½ tablespoon sweetener. If you use 90% chocolate, 2 tablespoon sweetener works well. If your chocolate already contains sweetener, adjust accordingly. If you're in the US, Lily's is always a good option. The nutrition info is calculated using unsweetened chocolate. If you used 90% chocolate, the amount of net carbs increases to 4.7 per portion. If you want to turn your cakes out, grease your ramekins REALLY WELL! If you are only after the taste, there's no stress - just serve in the ramekins. My ramekins measured 2 inch at the bottom and 3 at the top. If you want to make 1 larger portion, you might need to increase the time in the oven by 2-3 minutes. Do not over-bake! The top needs to be set, but jiggly. My first round of cakes baked for 12 minutes and they were firm in the middle. Don't deprive yourself of that gooey centre! These cakes are best eaten straight out of the oven! If you leave them in the ramekins for long, they will continue to cook and set more than you might like HAPPY VALENTINE!
    February 1, 2024
    In my world, every day is love day …. but it’s almost February and we are entering into the commercial love month, and soooooo many of us are getting triggered. Many of my clients are starting to feel the pull…for some it’s even worse than the stress of the Christmas / Hanukkah season. ● If you’re in a relationship and it’s not going well, you’re gonna get triggered. ● If you’re not in a relationship and you want one, you’re gonna get triggered. ● If your relationship has recently ended, you’re gonna get triggered.
    By Roxane Melançon January 23, 2024
    COMPLIMENTARY MEDITATION GUIDE
    By Roxane Melançon January 23, 2024
    INTENTION – AFFIRMATION – MANIFESTATION
    October 31, 2023
    Healthy Nutrition I don’t know about you, but my days fly by and taking time to nurture my body, more so my cells, with the right nutrients can be challenging, your day-to-day activities take over and next thing you know you’ve skipped a meal! Morning routine for some is very hectic, getting your kids ready for school, leaving early for work because you have a long commute, taking the time for your self to have a good healthy breakfast takes a back seat! Introducing Foodicyn! Juice on Another Level Foodicyn has changed the BREAKFAST RULES! The focus is on the five principles of Alkaline, Fibre, Vitamins, Minerals and Enzymes in a fun, new exciting, abundant, and tasty way are helping to bring the human body back to life. The tried, tested and true daily nourishing routine helps you break old habits that no longer serve you and allow you to honour your CELLf each and every morning. In doing so, you awaken and nourish your dormant cells. In return, inflammation settles down and you just start to feel better from within…ahhhhh! The goal at Foodicyn is to make Health SECCE. That’s Simple, Educational, Convenient and Cost Effective because after all being a healthy human being should never have been so difficult in the first place. So, if you’re sick and tired of always feeling sick and tired, why not give it a try and nourish your CELLF like never before.
    October 11, 2023
    Aging is a natural process of life, as far as we can remember, people have been fascinated and searching for a miracle fountain of youth! We are all too familiar with mainstream anti-aging treatments that are being offered nowadays! Botox (Botulinum Toxin Therapy) Dermal Fillers Cosmetic Plastic Surgery Chemical Peels Rhytidectomy Microdermabrasion 1000’s of Anti-Aging Cosmetic Products with Retinol/Retinoid on the market
    pumpkin pie
    October 11, 2023
    Vegan - Gluten Free Pumpkin Pie THE BEST Pumpkin Pie that requires just 10 ingredients and is both vegan and gluten-free! Crisp crust, flavourful pumpkin center — the perfect pumpkin pie for your holiday meals. CRUST INGREDIENTS: 1¼ cup Bob’s Red Mill 1:1 Gluten-Free Flour* ¼ teaspoon salt 6 tablespoons cold vegan butter 4-6 tablespoons ice cold water FILLING INGREDIENTS: 2 ¾ cups pumpkin puree (1 ½ 15-ounce cans yield 2 ¾ cups) ¼ cup cup maple syrup ¼ cup cup brown sugar 1/3 cup unsweetened plain almond milk 1 tablespoon olive oil (or melted coconut oil) 2 ½ Tbsp cornstarch or arrowroot powder 1 ¾ teaspoon pumpkin pie spice (or sub mix of ginger, cinnamon, nutmeg & cloves) ¼ teaspoon sea salt FOR SERVING (OPTIONAL): Coconut Whipped Cream Vegan Pumpkin Pie Ice Cream PREPARATION: To prepare crust, add gluten-free flour and salt to a large mixing bowl and whisk to combine. Slice or dollop the cold butter in and work gently with a fork or pastry cutter to cut it in. Don’t overwork, just get it incorporated. Next add ice cold water a little at a time and use a wooden spoon to stir. Only add as much water as you need to help it come together (don't add more than 6 tablespoons). Once a crumbly dough is formed, transfer to a piece of plastic wrap (or parchment paper) and work gently with your hands to form a 1/2-inch-thick disc. Wrap firmly and refrigerate for a minimum 30 minutes, up to 2 days. Just let it warm back up a little before using. You don’t want it too warm, or it can get too soft to handle. Once your dough is chilled, preheat oven to 350 degrees F (176 C) and prepare pie filling. Add all pie filling ingredients to a blender and blend until smooth, scraping down sides as needed. Taste and adjust seasonings as needed. Set aside. To roll out the crust, unwrap the disc and place it between two sizable layers of parchment or wax paper (plastic wrap will work OK, but is a little more difficult to work with). Use a rolling pin to gently roll it into the shape of your pie pan (we recommend a standard 9-inch pan). If it cracks, don’t stress – you can reform it with your hands once you get it in the pan. But try and be gentle. To transfer the crust, remove the top layer of wax paper and gently lay the pie dish face down on top of the crust and use the support of the wax paper to invert it quickly but carefully. Don’t overthink it – just do it. Once you get the crust inverted, gently use your hands to form it into the pan, working the crust up along the sides. It can be a little tricky, but it bakes beautifully, so it’s worth the effort! Just try not to overwork the dough in the process – it shouldn’t take more than a few minutes to perfect the shape. Any holes or cracks can be mended with a little excess dough and the heat of your hand. TIP: I would advise against trying to be fancy and do any elaborate design with the crust, so just get the crust in, get a flat edge and go. Pour filling into pie crust and bake for 58-65 minutes. The crust should be light golden brown, and the filling will still be just a bit jiggly and have some cracks on the top. Remove from oven and let cool completely before loosely covering and transferring to the refrigerator to fully set for 4-6 hours, preferably overnight. Slice and serve with coconut whipped cream and an additional sprinkle of cinnamon, nutmeg, and/or pumpkin pie spice (optional). This would also be amazing with my Vegan Pumpkin Pie Ice Cream and Brown Sugar Pecans. Source: Vegan Gluten-Free Pumpkin Pie | Minimalist Baker Recipes HAPPY THANKSGIVING FROM OUR LOVING HEALTH ENERGIES VAUGHAN FAMILY TO YOURS!
    More Posts
    Share by: